Drawing tools
Choose a tool, color, and layer to draw and edit pixels on your SpriteOpal canvas.
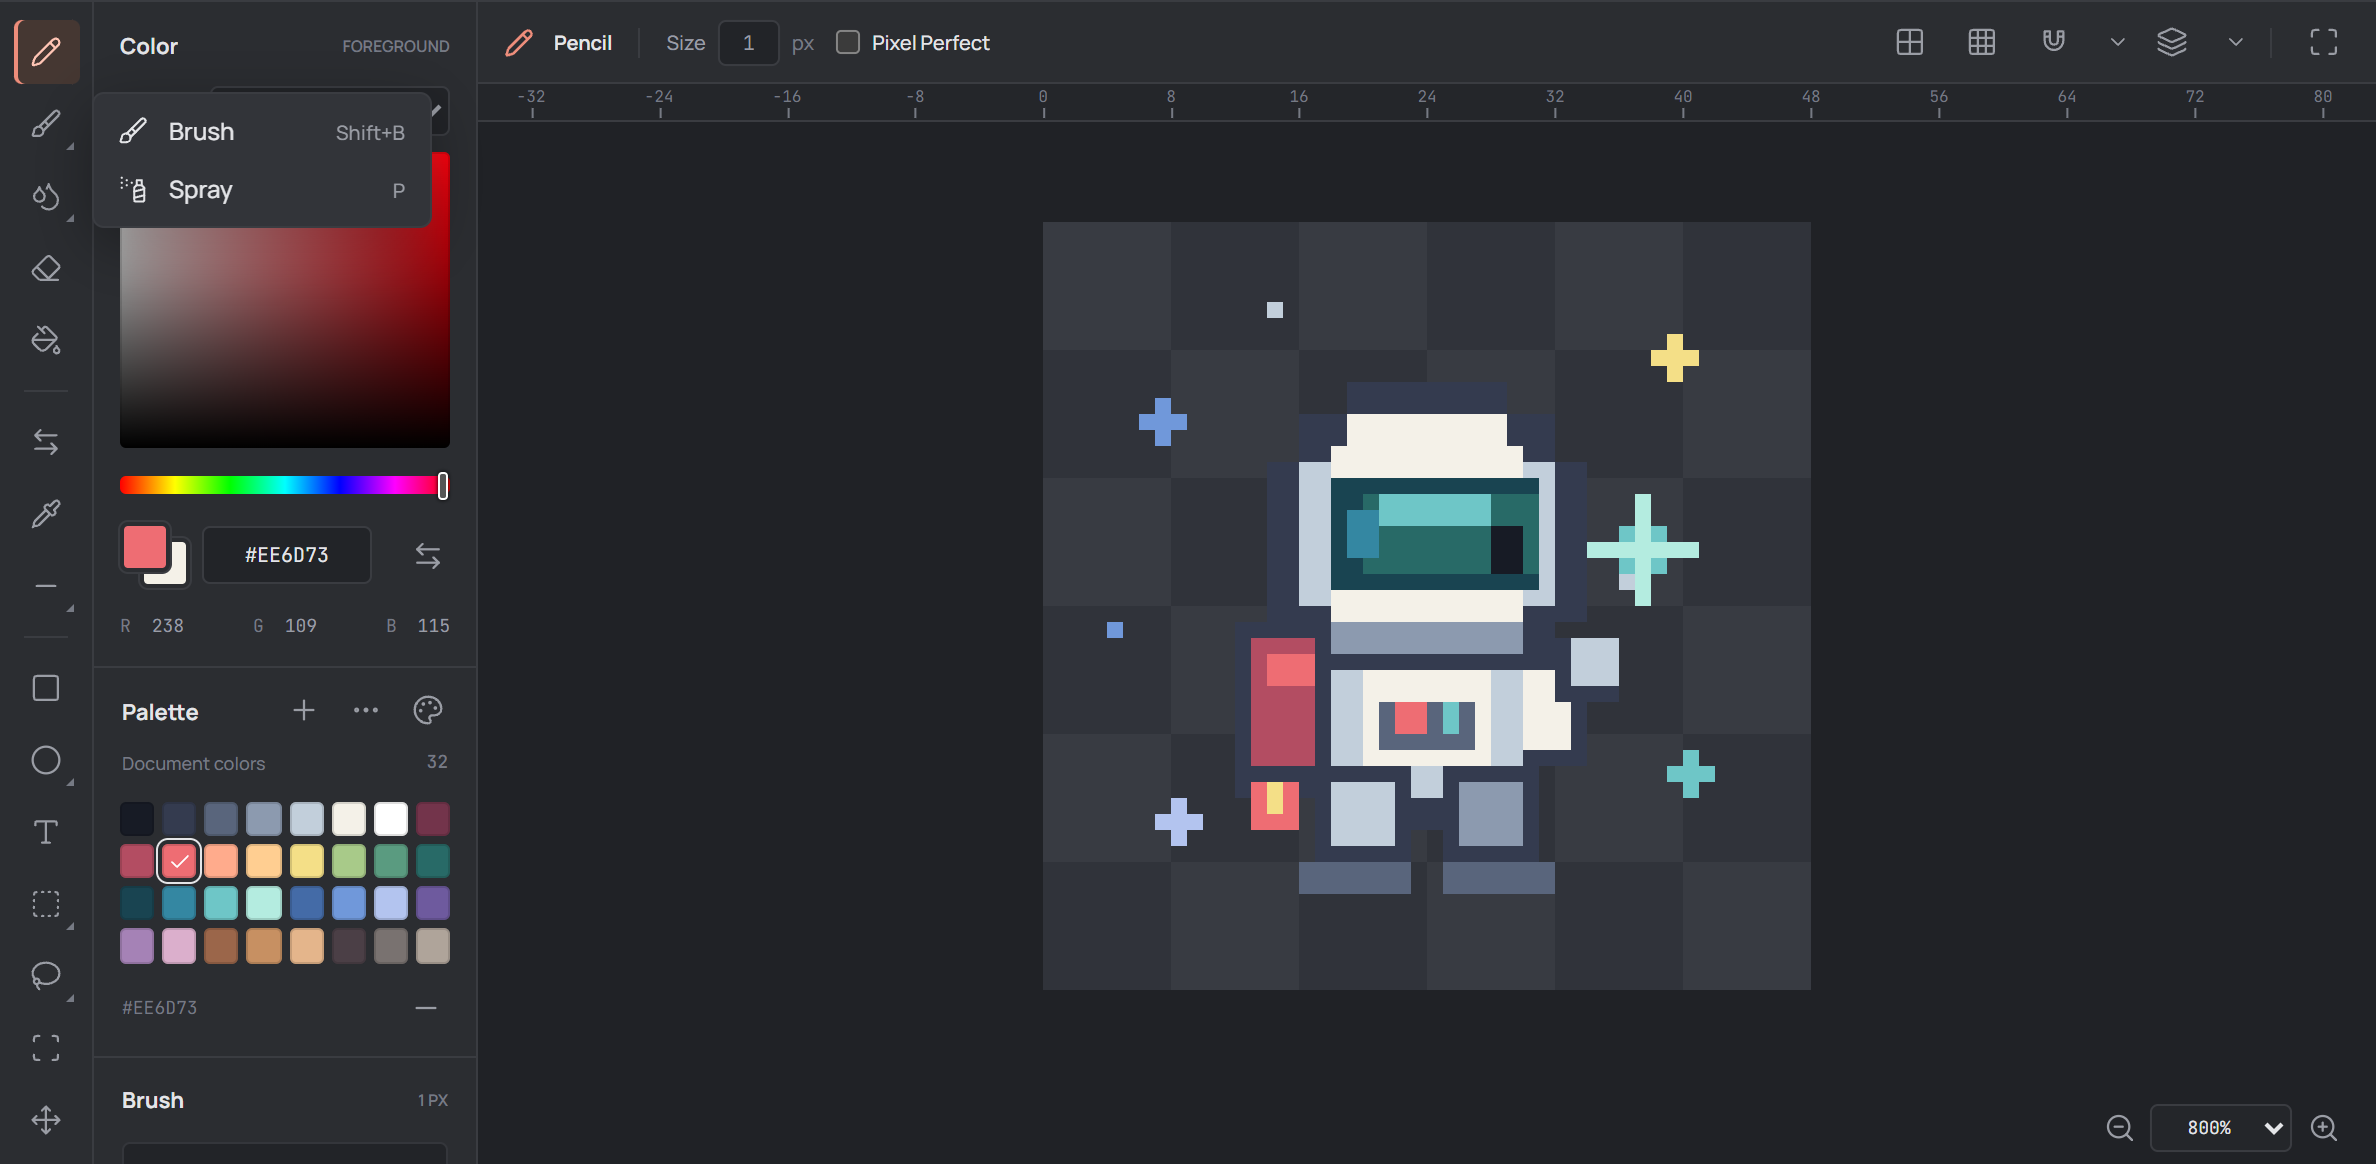
Before you draw
Open an artwork or create one with the New artwork guide. Select the layer you want to edit in the Layers panel and the frame in the timeline. Choose a foreground color from the Color panel or a palette swatch, then select a tool on the left rail.
The active tool and its settings appear above the canvas. Click or drag on the canvas to use it. If an edit does not appear, check that the intended layer is visible and unlocked, the correct frame is selected, and animation playback is stopped.
Find and select tools
Click a tool icon to select it. Some icons have a small triangle: right-click or press and hold one to reveal its group, then choose a tool from the menu. For example, Brush and Spray share a group, as do Line and Curve. The rail shows the most recently used tool in each group.
You can also use shortcuts: B for Pencil, Shift + B for Brush, E for Eraser, G for Paint bucket, and I for Eyedropper. Shortcuts shown here are the default bindings.
Draw, erase, and pick colors
Use Pencil for pixel strokes and Brush for round strokes. Click for a mark or drag for a continuous stroke. Set Size above the canvas or use the slider and presets in the Brush panel. The Spray tool scatters marks; its toolbar includes width and speed controls.
Use Eraser to remove pixels from the active layer. A Background layer remains opaque and uses the background color when erased. To reuse a color from the artwork, select Eyedropper and click the canvas; the sampled color becomes the foreground color.
For a 1-pixel Pencil, Pixel Perfect removes extra corner pixels on the next stroke. It is unavailable at other pencil sizes and does not apply to custom image brushes or non-normal ink.
Fill an area
Select Paint bucket and click the area to fill with the foreground color. With Contiguous enabled, the fill follows connected matching pixels; turn it off to include matching pixels elsewhere. Tolerance controls how closely colors must match, and 4-way or 8-way connectivity controls which neighbors count as connected.
Choose Active layer or All visible layers as the source for comparing colors. The fill is applied to the active layer; an active selection limits the affected area.

Gradients, lines, and shapes
Choose Gradient and drag from the foreground toward the background color; right-drag reverses them. Open Gradient options to choose a linear or radial gradient and adjust dithering. A gradient fills the active layer or selection, and Escape cancels its preview.
For a straight line, select Line and drag between endpoints. Rectangle and Ellipse are also drawn by dragging; use Filled in the toolbar to fill the shape instead of drawing only its outline. The Ellipse group also contains Polygon and Contour.
With Polygon, click points and double-click, click the first point, or press Enter to close it. Contour fills a freehand outline when you release the pointer. The Curve tool starts with a dragged line, followed by two drags to bend it; press Enter to finish or Escape to cancel.
Review and save
Use Undo or Ctrl + Z to reverse an edit, and Redo or Ctrl + Shift + Z to restore it. Zoom controls help inspect individual pixels. Save your editable work with File → Save project; see Opening & saving for details.