Tilesets & tilemaps
Create reusable tiles, arrange them on a tilemap layer, and export the tiles and map data.
Create a tilemap layer
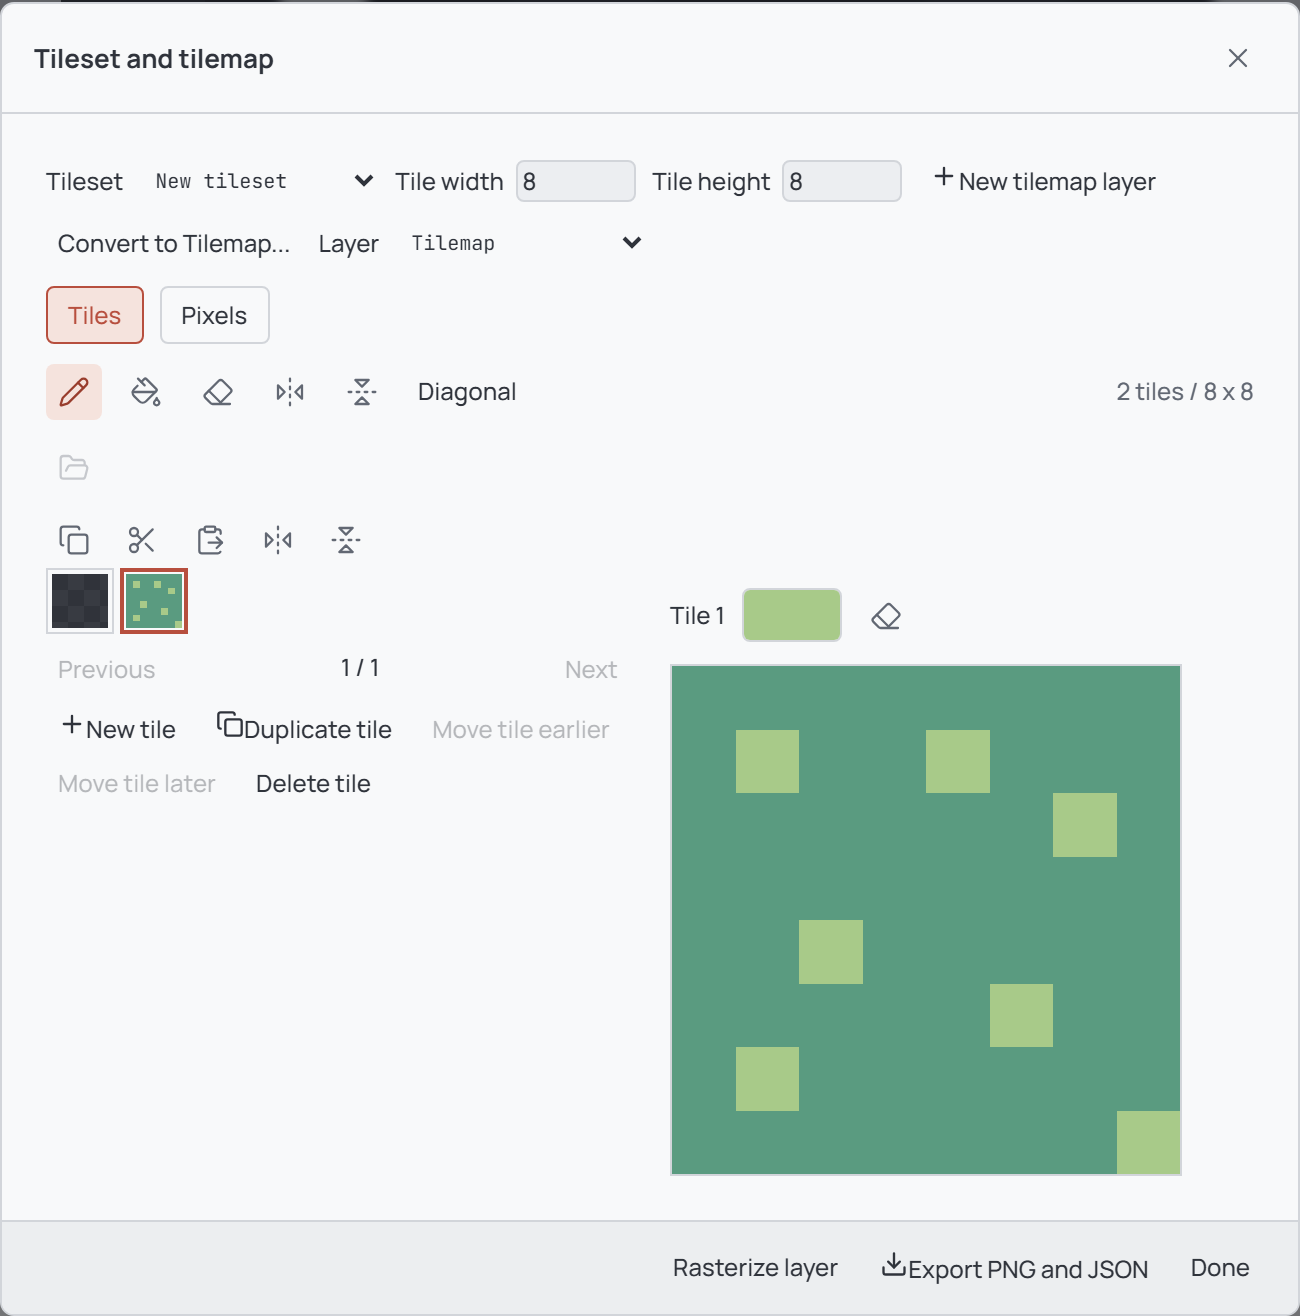
Open an artwork and select Tilemaps in the Layers panel. In the dialog, choose New tileset and enter a Tile width and Tile height from 1 to 64 pixels. The default is 8 × 8; rectangular tiles are allowed. Select New tilemap layer to create and select the layer.
Alternatively, choose an existing tileset in the Tileset menu before creating the layer. The new layer shares its tiles and dimensions. Use the dialog's Layer menu to switch between tilemap layers.
Create and edit tiles
A new tileset contains transparent tile 0 and an editable blank tile 1. Select tile 1 in the thumbnails, choose a color, and draw in the enlarged tile editor. Use Erase tile pixels or right-click to erase. Tile 0 always represents an empty cell and cannot be edited.
Use New tile for a blank tile or Duplicate tile for an independent copy. The move and delete buttons organize the tileset; tile references are updated accordingly. Use Previous and Next to browse larger tilesets.
Editing a source tile changes every occurrence that uses it, including occurrences in other frames or layers sharing the tileset. Unlock all layers sharing it before editing, reordering, or deleting shared tiles.
Place tiles on the canvas
Choose Tiles mode, select a tile, and choose Paint tiles, Fill tiles, or Erase tiles. Select Done, then click or drag on the canvas to apply the selected tile brush to the active tilemap layer and frame. Reopen Tilemaps to change the tile or brush.
The horizontal, vertical, and Diagonal flip controls change the orientation used when placing tiles without changing their source pixels. They can be combined; diagonal transforms on rectangular tiles are clipped to the supported square overlap.
In Tiles mode, selections work with whole cells. Move, copy, cut, paste, and flip tile selections without flattening their tile references. A pasted or dragged preview can be cancelled with Escape; apply a paste with Enter or Apply tile edit.
Edit pixels on the map
Choose Pixels in the Tilemaps dialog to use Pencil, Brush, Eraser, or Fill directly on the tilemap. The Tileset mode determines how the resulting tile sources are handled:
Manual edits shared source tiles, so all their occurrences change. It cannot paint into empty tile 0. Auto separates changed shared occurrences, reuses matching tiles where possible, and removes changed sources that become unused. Stack retains the original tiles and adds or reuses the edited result.
For Manual or Auto, unlock any layers sharing the tileset if the editor reports a lock. Pixel editing creates or reuses tiles; it does not automatically generate terrain rules.
Convert an existing layer
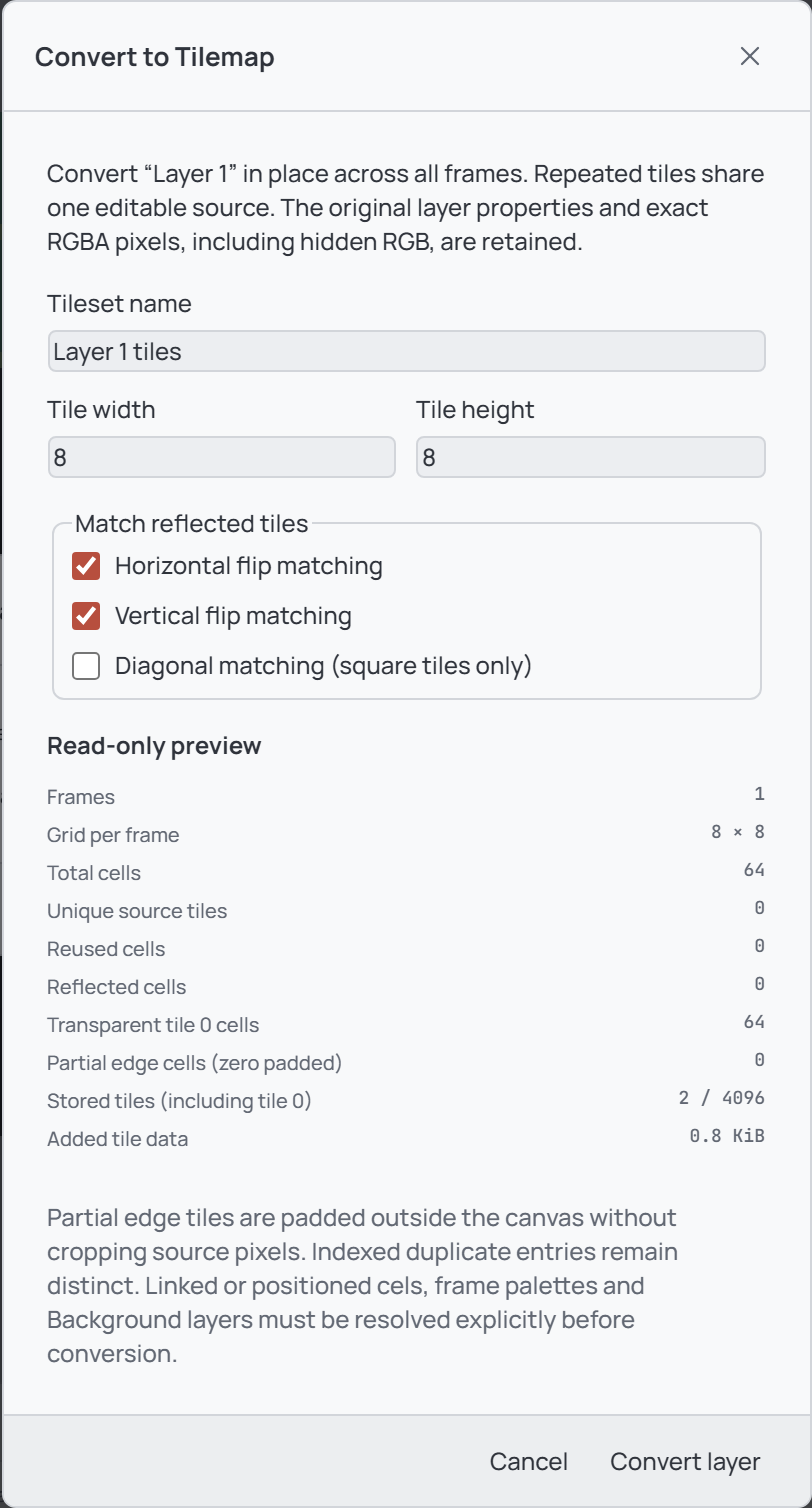
Select a raster layer, open Tilemaps, and choose Convert to Tilemap.... Enter a tileset name and tile dimensions. Horizontal and vertical matching can reuse reflected tiles; diagonal matching requires square tiles. Review the read-only preview, then select Convert layer or Cancel.
Conversion replaces the selected layer in place across all frames, sharing repeated tile sources while retaining the layer's properties and pixels. Partial edge tiles are padded outside the canvas. Background or locked layers, linked or positioned cels, and frame palettes must be resolved before conversion; follow the message in the dialog. Undo can reverse the conversion.
Save, export, and rasterize
Save the editable artwork as an .opal project with File → Save project. To export the active tilemap, open Tilemaps and choose Export PNG and JSON. The PNG is a tileset atlas; the JSON contains the tile dimensions, frame cell references, durations, and flip flags. In the desktop app, choose the PNG destination; in the browser, both files are downloaded.
Choose Rasterize layer if you need to turn the active tilemap into an ordinary pixel layer. Its tile references are removed from that layer; use Undo if you need to restore them. Some pixel effects require rasterization first.
In the desktop app, the link button can connect a tileset to another .opal project. Refresh is explicit, and editing the cached tiles does not write to the source file; use Embed tileset copy to remove the connection.