Workspace overview
Get to know the areas you use to draw, organize layers, and animate your artwork in SpriteOpal.
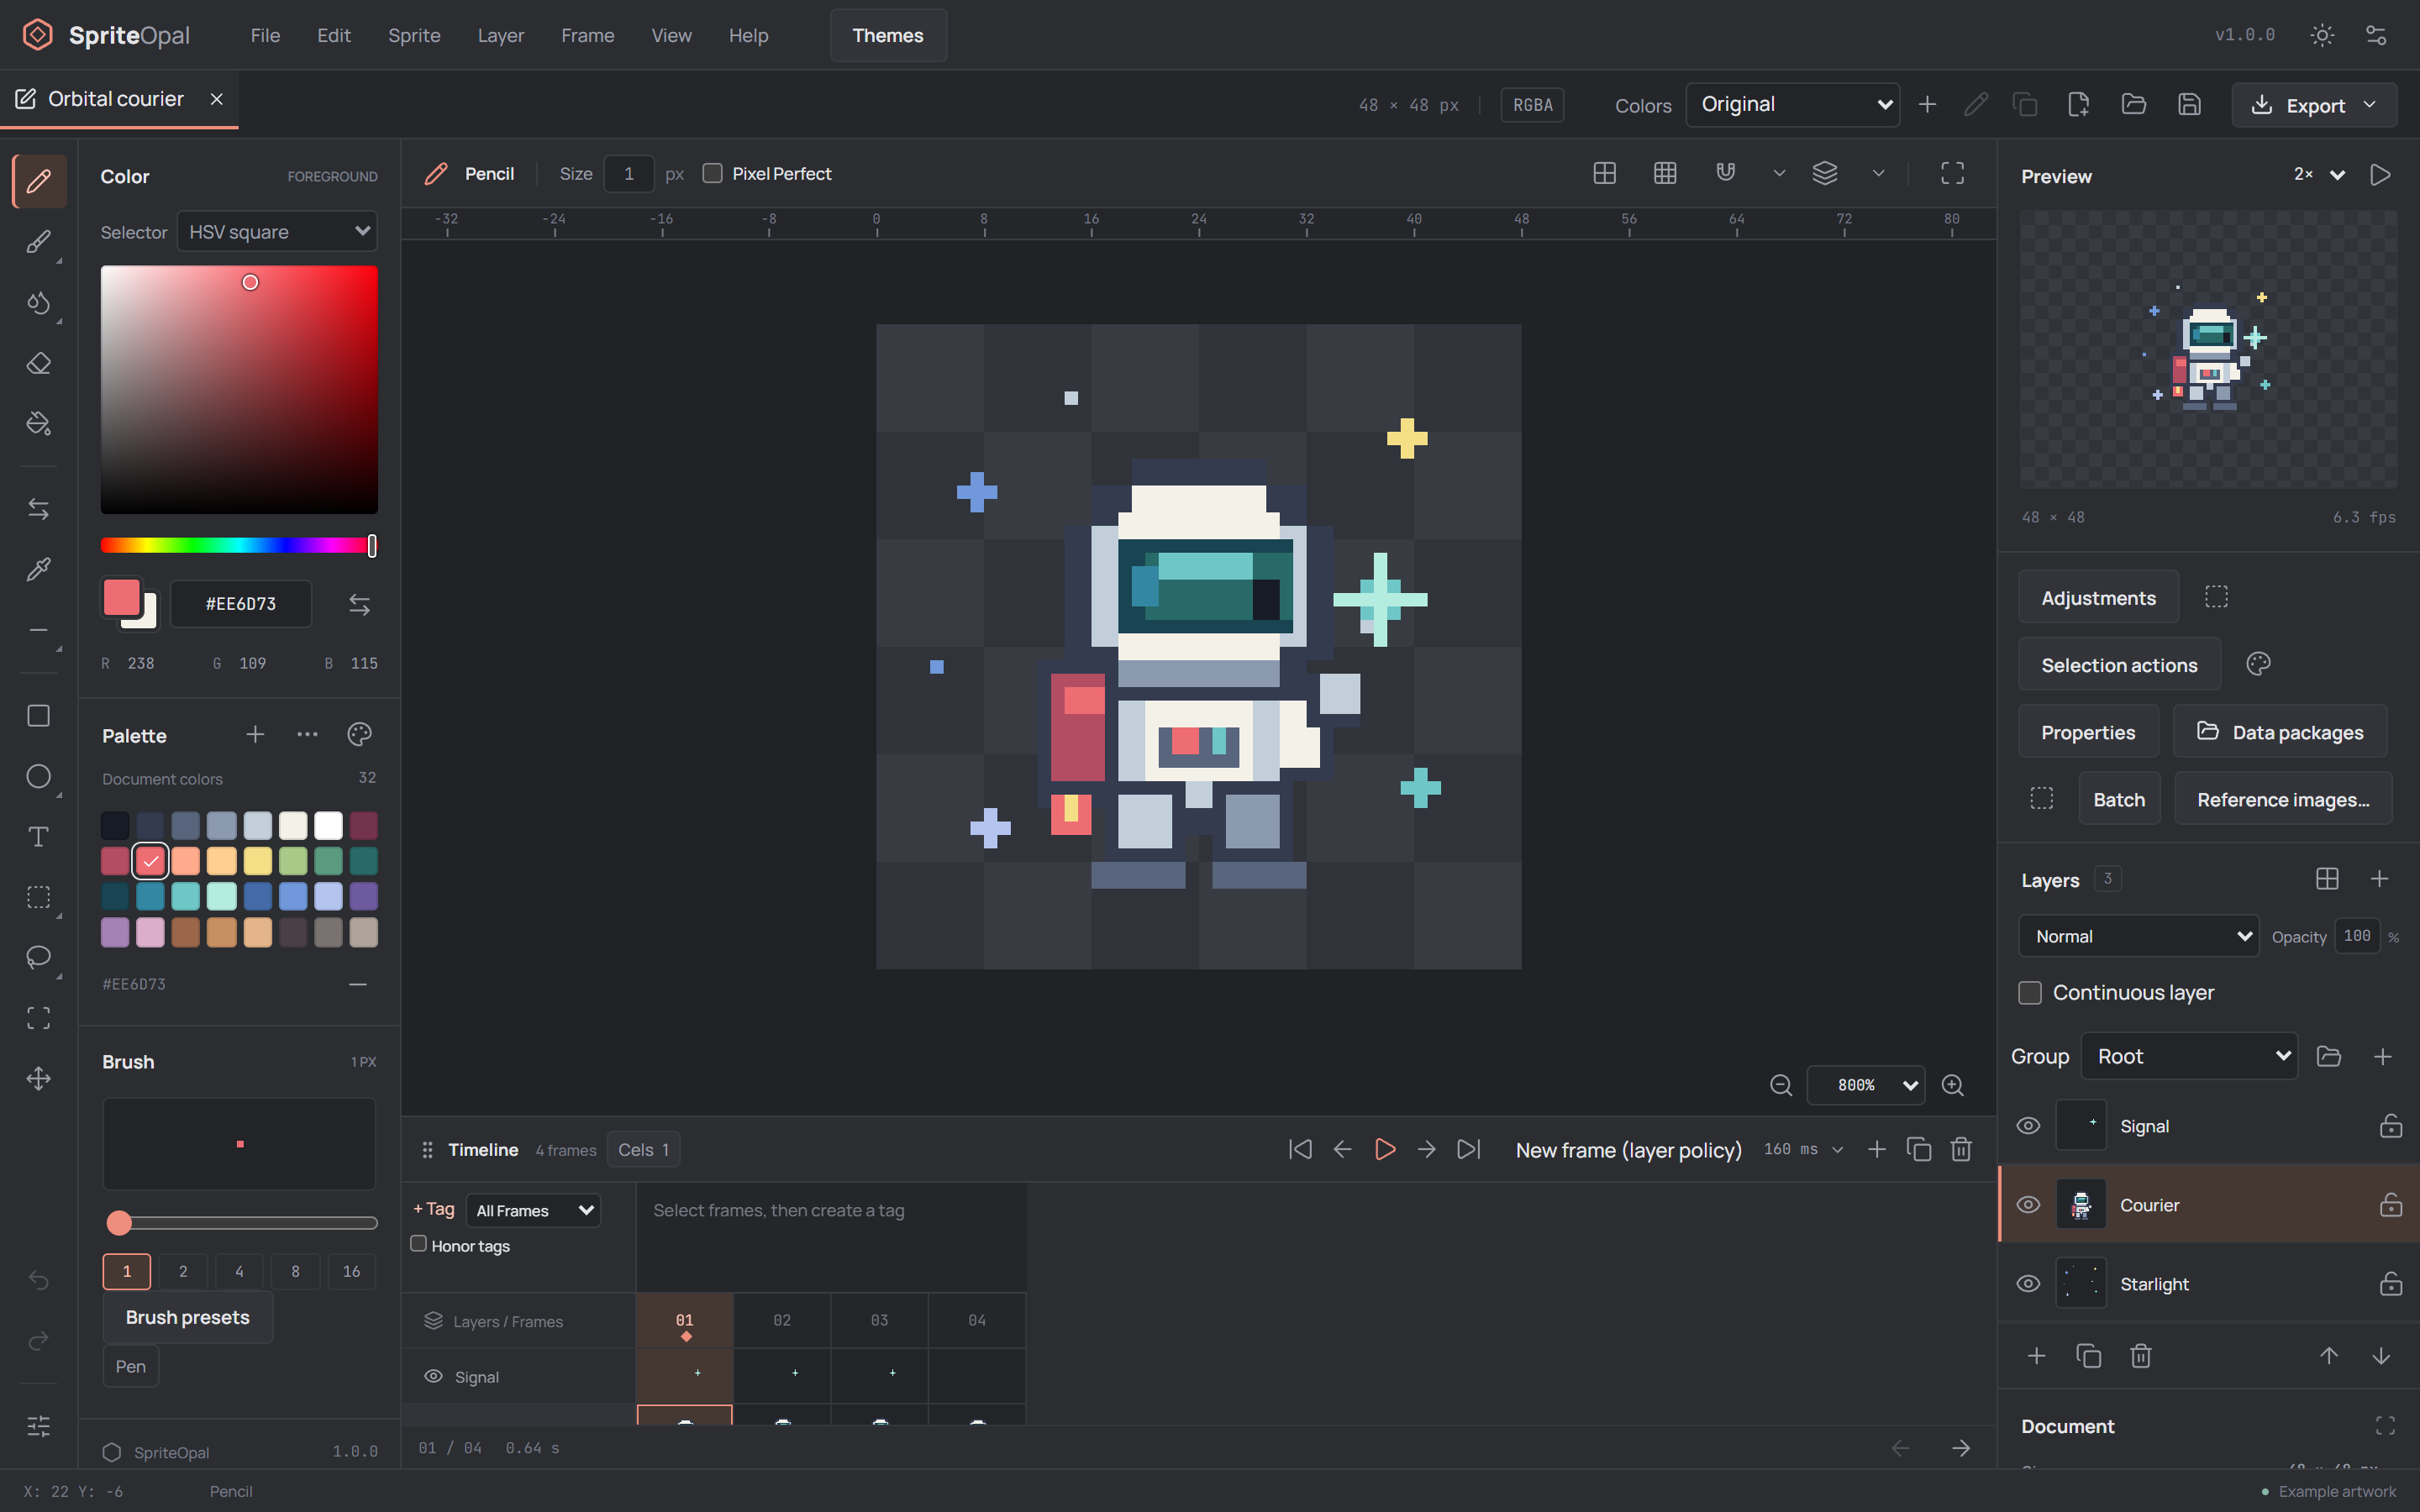
Menus and artwork tabs
The menu bar at the top contains File, Edit, Sprite, Layer, Frame, View, and Help commands. Use File to create, open, save, or export artwork. The buttons on the right of the document bar also provide quick access to these actions.
Open artworks appear as tabs below the menus. Select a tab to switch documents; its close button closes that artwork. A dot on a tab indicates unsaved changes. The document bar also shows the current canvas dimensions and color mode.
Drawing tools and colors
The narrow rail on the far left contains drawing, selection, and other editing tools. Select a tool there, then use the options above the canvas to adjust settings for that tool. Undo and Redo are near the bottom of the rail.
The adjacent Color panel controls the foreground color used for drawing and the background color. Choose a color in the selector or enter a hex value; use the swap button to exchange the two colors. The Palette panel holds document color swatches, and the Brush panel offers size controls and presets.
Canvas and view controls
The center canvas is where you edit the active artwork. Select a layer and frame, choose a tool and color, then draw on the canvas. The checkerboard visible behind transparent areas is a transparency indicator, not artwork.
Use the zoom controls at the lower right of the canvas to zoom in or out, or choose a percentage. Select Fit artwork above the canvas to fit it to the view. The same toolbar includes controls for the pixel grid and onion skin.
Preview and layers
The Preview panel on the right shows the artwork at a separate scale. Use its scale menu and play or pause button to inspect an animation without changing the canvas zoom.
In the Layers panel, select a layer before editing it. The eye button shows or hides it, and the lock button protects it from editing. The panel also provides controls for adding, duplicating, deleting, and reordering layers, as well as adjusting the selected layer's opacity and blend mode.
Timeline and frames
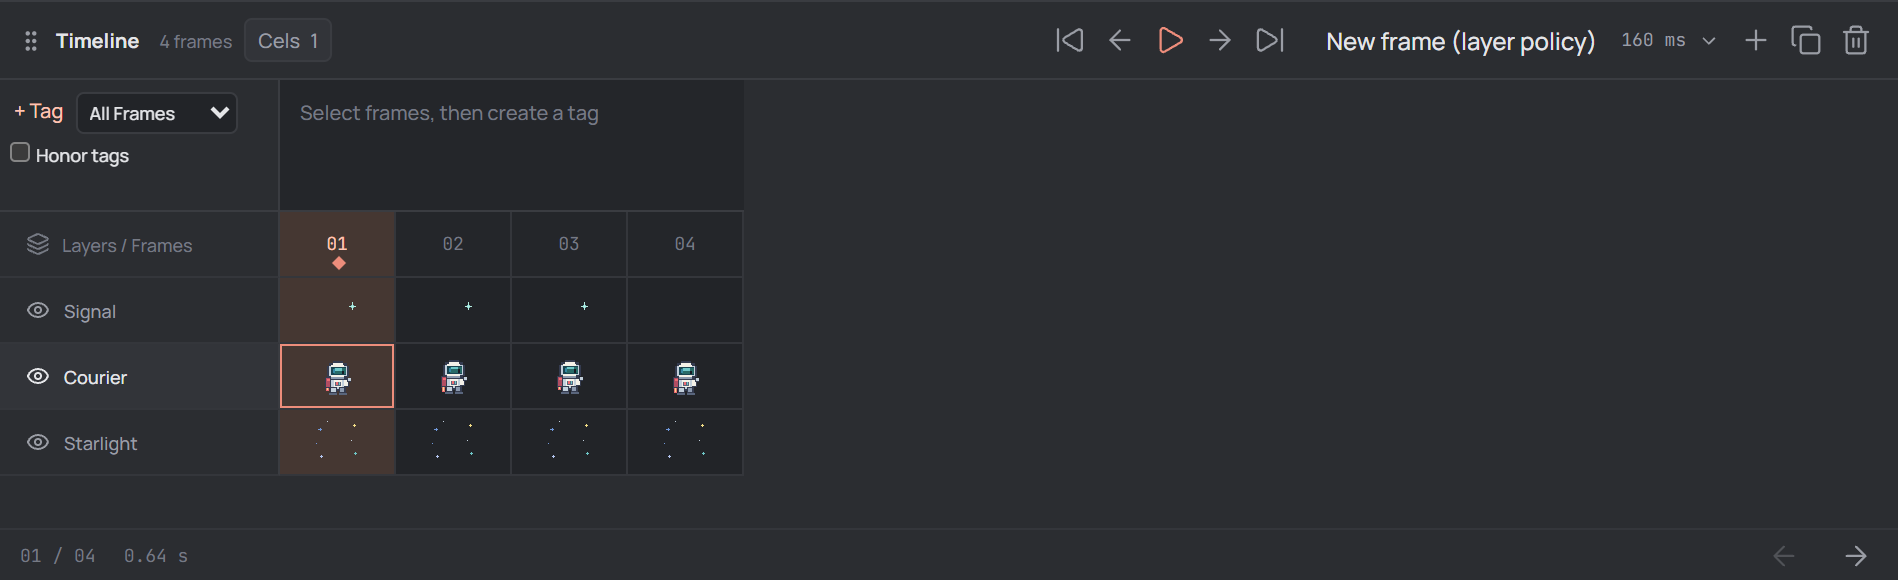
The timeline below the canvas arranges frames in columns and layers in rows. Select a frame header to move to that frame, or select a cel at a layer and frame intersection to work there. The highlighted column and cel show the current selection.
Use the timeline controls to move between frames, play or stop animation, add an empty frame, duplicate a frame, or adjust its duration. The Preview panel has its own playback control.
Arrange your workspace
Drag the dividers beside the sidebars or above the timeline to resize them. Choose View → Workspace layouts... to show or hide panels, mirror the sidebars, or reset the layout. These layout changes apply to all documents without changing artwork or undo history.
For more canvas space, choose View → Focus Mode; use Exit Focus Mode to return. Your panel arrangement can differ from the screenshots depending on your layout settings.
Start working
To begin a new project, follow the New artwork guide. Once you have drawn, save the editable project with File → Save project; use Export when you need an image.