Visibility, locking & blending
Control which layers appear, protect artwork from accidental edits, and adjust how layers combine.
Show and hide layers
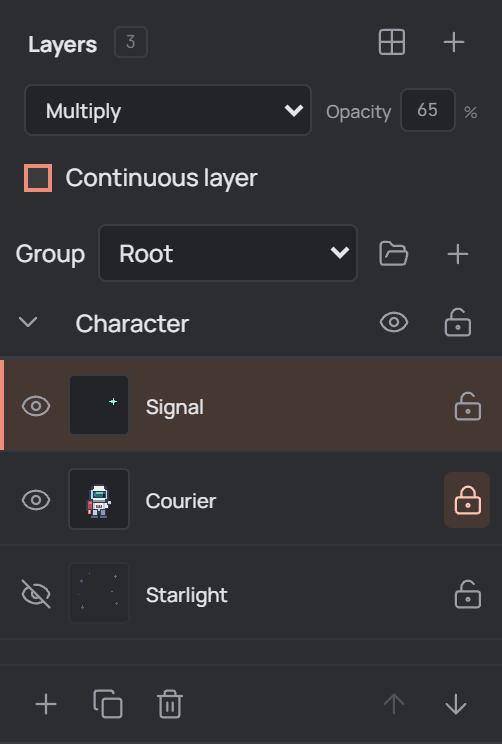
Find Layers in the right sidebar. The eye button at the left of each layer row controls its visibility: select it to hide the layer, then select the crossed-out eye to show it again. Hiding does not delete the layer or its pixels; it removes them from the displayed composition and normal artwork exports while hidden.
Visibility is not a lock. A hidden layer can still be active and edited, even though its changes are not visible in the composition. Before drawing, select the intended layer and check both its eye and lock icons.
Protect a layer with a lock
Select the lock at the right of a layer row to lock it. The closed lock marks a protected layer; select it again to unlock. A locked layer can remain visible, but attempts to edit its pixels are blocked. Locking does not hide the layer or prevent you from changing its properties.
If editing still reports that a layer is locked after you unlock its row, check the lock on its group and any parent groups. A locked parent also protects its contained layers. Unlock the parent as well before editing.
Adjust layer opacity
Select a layer row, then enter a value from 0 to 100 in Opacity above the list and leave the field to apply it. At 100% the layer uses its full opacity; at 0% it contributes no visible pixels. Values in between let the artwork below show through.
This setting applies to the selected layer across its frames and does not erase its pixel data. It combines with any transparency already in the pixels and cel. To restore the original full layer strength, set opacity back to 100%.
Choose a blend mode
With the desired layer selected, open the blend mode menu beside Opacity. Normal is the standard composition. Other modes change how the layer's colors combine with what is beneath it; the result depends on both layers, their order, and opacity.
Try Multiply for darker shading, Screen for lighter highlights, or Overlay for contrast. The menu also includes Darken, Color Burn, Lighten, Color Dodge, Add, Soft Light, Hard Light, Difference, Exclusion, Subtract, Divide, Hue, Saturation, Color, and Luminosity. Experiment and return to Normal to remove the blending effect.
The layer's underlying pixels remain separate while you adjust these properties. For a useful comparison, toggle the layer's eye or change the mode and opacity while viewing the canvas.
Apply settings to a group
Groups appear above the layer list. Their eye and lock buttons control the whole group, including nested groups. Showing or unlocking a parent does not override an individual child's own hidden or locked state. The arrow beside a group only collapses or expands its layers in the list; it does not hide the group on the canvas.
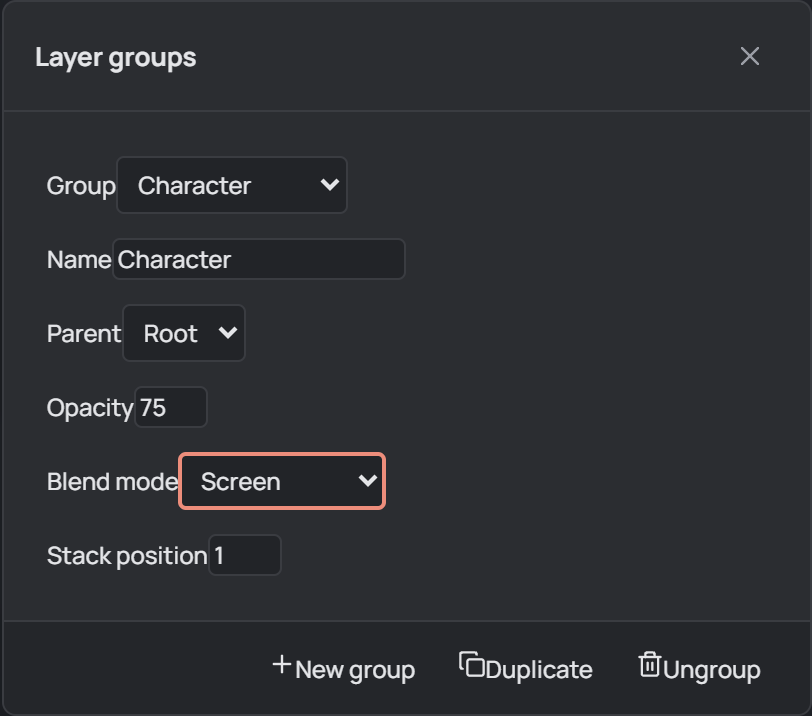
To change a group's opacity or blend mode, click its name or the folder button beside Group, select the group in Layer groups, and edit Opacity or Blend mode. These are separate from the active layer's controls: the group's contents are combined, then the group settings are applied to that result. Changes take effect when the field is changed.
See Layers & groups for creating groups and assigning layers.
Check and save the result
If an expected layer is missing, check its eye, opacity, and parent group visibility. If a blend looks unchanged, check what is beneath it and whether the layers overlap. A special Background layer is fixed at Normal and 100% opacity, so its layer blend and opacity controls are disabled.
Use Undo to reverse an unwanted property change, and choose File → Save project to preserve the editable layer settings. Check the visible composition before exporting a finished image.