Layers & groups
Keep parts of your artwork separate, arrange their stacking order, and organize related layers into groups.
Find and select a layer
Open an artwork and find Layers in the right sidebar. The list shows each layer's thumbnail for the current frame, name, visibility, and lock controls. Click a layer row or its thumbnail to make it active before drawing; the active row is highlighted.
Layers higher in the stack appear over layers below them. Transparent pixels let the layers underneath show through, so you can keep a character, highlights, and background separate while viewing the combined artwork.
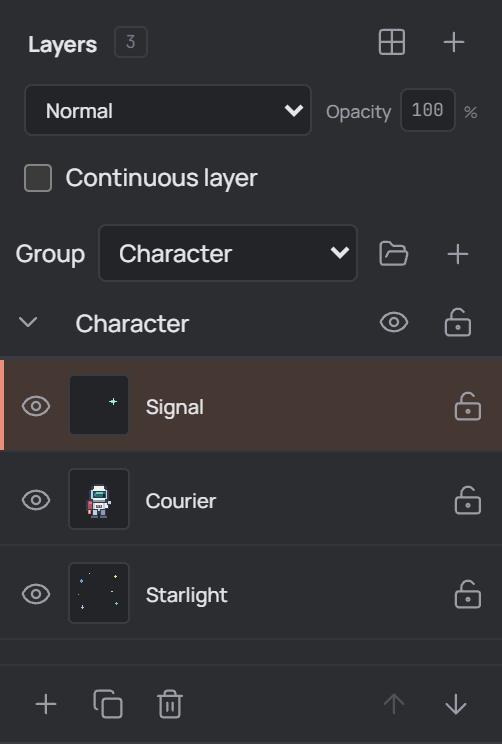
Add, rename, and arrange layers
Select the + in the Layers heading or footer to add a layer above the active layer. You can also use Layer → New layer or Ctrl + Shift + N. Click a layer's name field, type a descriptive name, and press Enter or leave the field to save it.
Select a layer and use the footer's Move layer up and Move layer down arrows, or the corresponding commands in the Layer menu, to change its position. Background layers have special stacking restrictions.
Use Duplicate layer to copy the active layer and its cels across frames. Delete layer removes the active layer and its cels; a document must retain at least one layer. Use Undo if you remove or rearrange a layer by mistake.
Create a group
Select the layer you want to organize, then choose the + beside the Group selector (Group active layer). This creates a group and assigns the active layer to it. If that layer is already in a group, the new group is created inside it.
To add another existing layer, select it and choose the group in the Group selector. Choose Root to move the active layer out of its group. A newly added layer starts at the root, so assign it to a group if needed.
The group summary appears above the layer list. Use its arrow to collapse or expand the group's layers, its eye to hide or show the group, and its lock to protect the group's layers from editing. Collapsing changes the list display, not the artwork's visibility.
Manage groups
Select the folder button beside Group to open Layer groups, or click a group name in the summary. Select a group in the dialog to edit its Name, Parent, Opacity, Blend mode, and Stack position. Changes take effect as you edit; close the dialog when finished.
Choose another group as Parent to nest the selected group, or choose Root to place it at the top level. A group cannot be its own ancestor. Group opacity and blend mode affect the group's combined appearance, while the layer controls apply to the active layer.
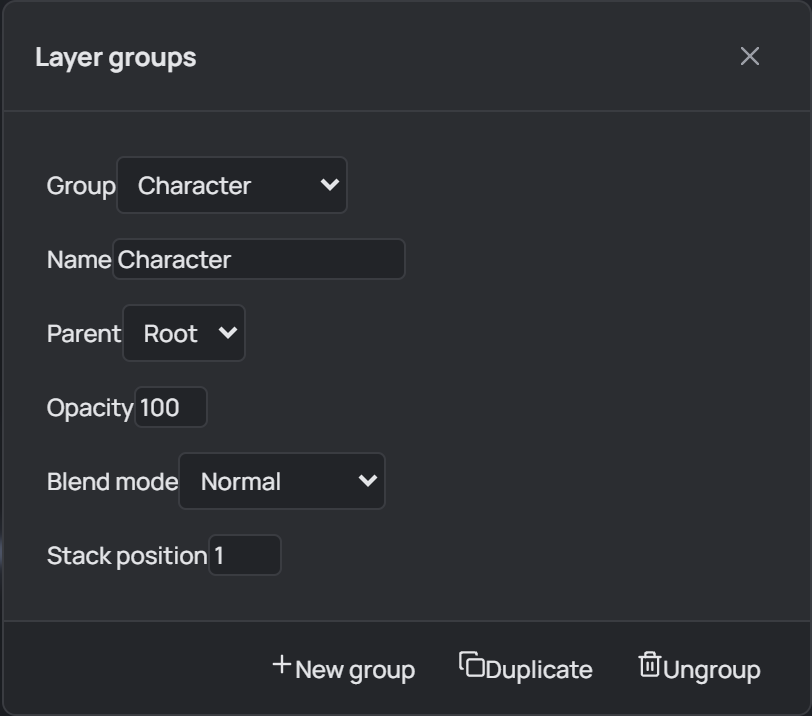
New group also groups the active layer. Duplicate copies the selected group, its nested groups, and their layers. Ungroup removes the selected group but keeps its layers and child groups, moving them to its parent or to the root.
Visibility, locking, and combining
Use the eye and lock icons on a layer row to show or hide that layer and prevent or allow editing. A hidden or locked parent group also affects its contained layers. Adjust the active layer's opacity or blend mode above the list; see Visibility, locking & blending for that topic.
Layer → Merge down combines the active layer with the layer immediately below it in the same group. It is unavailable when there is no suitable layer below or either layer is locked. Flatten visible combines visible top-level items while retaining hidden top-level items; Flatten combines all top-level items. These operations replace the combined layers, so save an editable project first if you need to keep them separate.
Save your changes with File → Save project to preserve the layer and group structure for later editing.